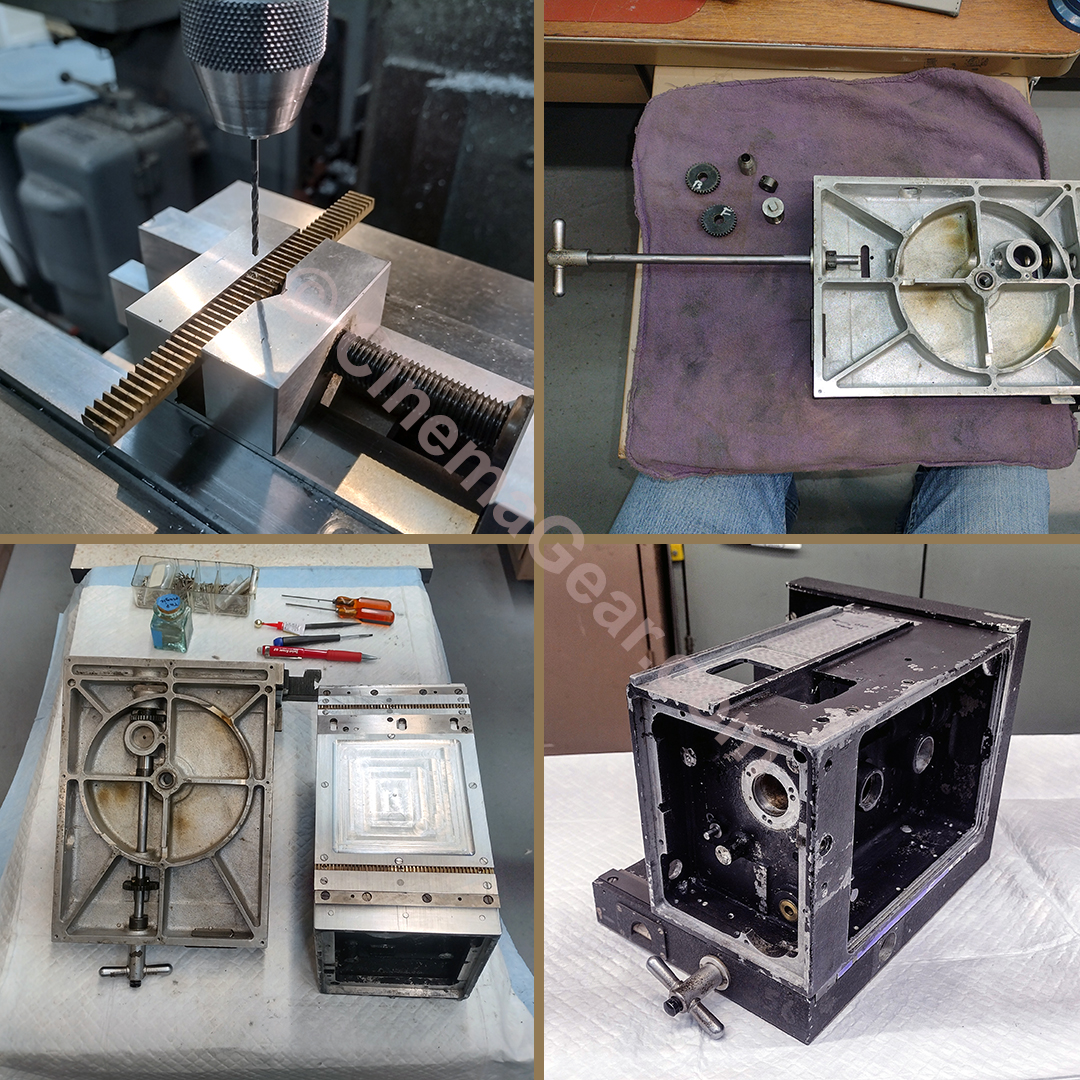
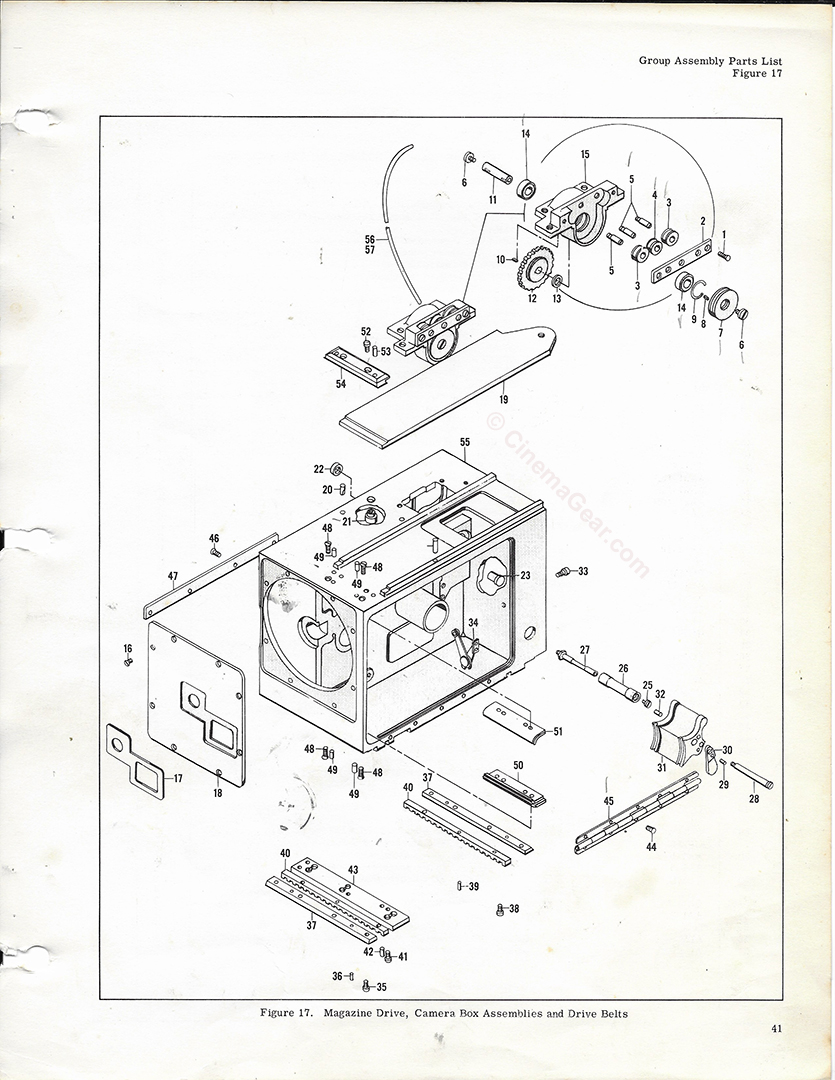
True to my word, I struggled through the myriad of steps needed to get Mitchell 46 back onto its rackover L-base this week. On its surface, this sounds like a simple process, but without the various fixtures that the Mitchell factory had to complete this, the process becomes complicated. Mechanically, the rackover L-base is a fairly simple device: a t-shaped handle operates a pair of gears that slide the camera back and forth on the L-base, and a spring loaded, precision ground plunger pops up into a hole to stop the camera in the correct positions for filming and viewfinding. Last week’s challenge was to mount the dovetails and get the camera to line up on the L-base so its vertical axis is true to the lens mount. This week’s challenge, without fixtures, was to get the rackover mechanism to stop the camera in its correct horizontal position. On the bottom of all Mitchell rackover cameras is a hardened and ground steel plate called, boringly, the locating plate. The locating plate stops the camera centered to the lens in both the shooting and viewfinding positions. The locating plate has to coordinate with the plunger in the L-base called (also boringly) the locating plunger. Getting these 2 pieces to coordinate correctly is further complicated by the fact that the locating plate is on the bottom of the camera, and the locating plunger on the L-base is underneath the camera when the camera is assembled on the L-base.
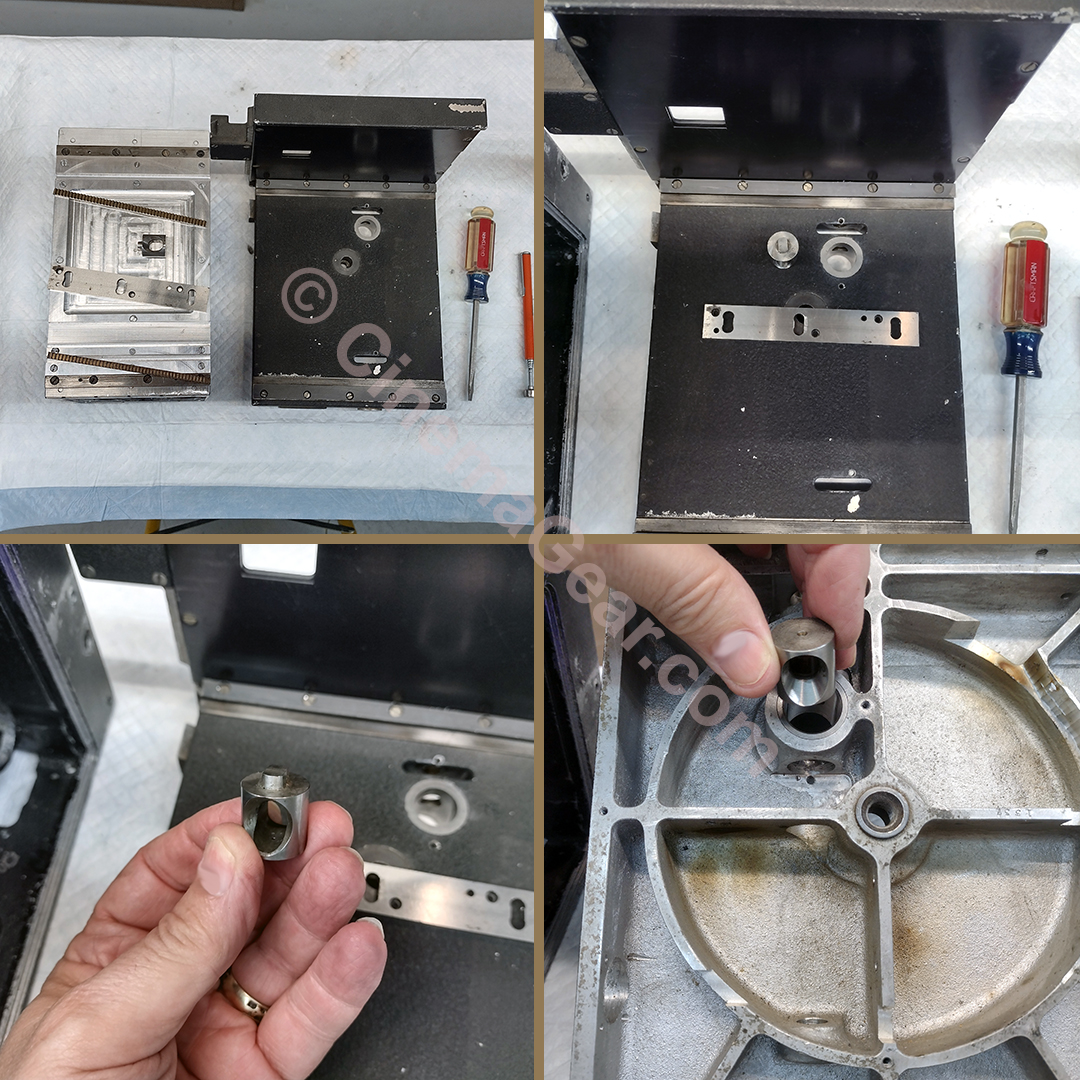
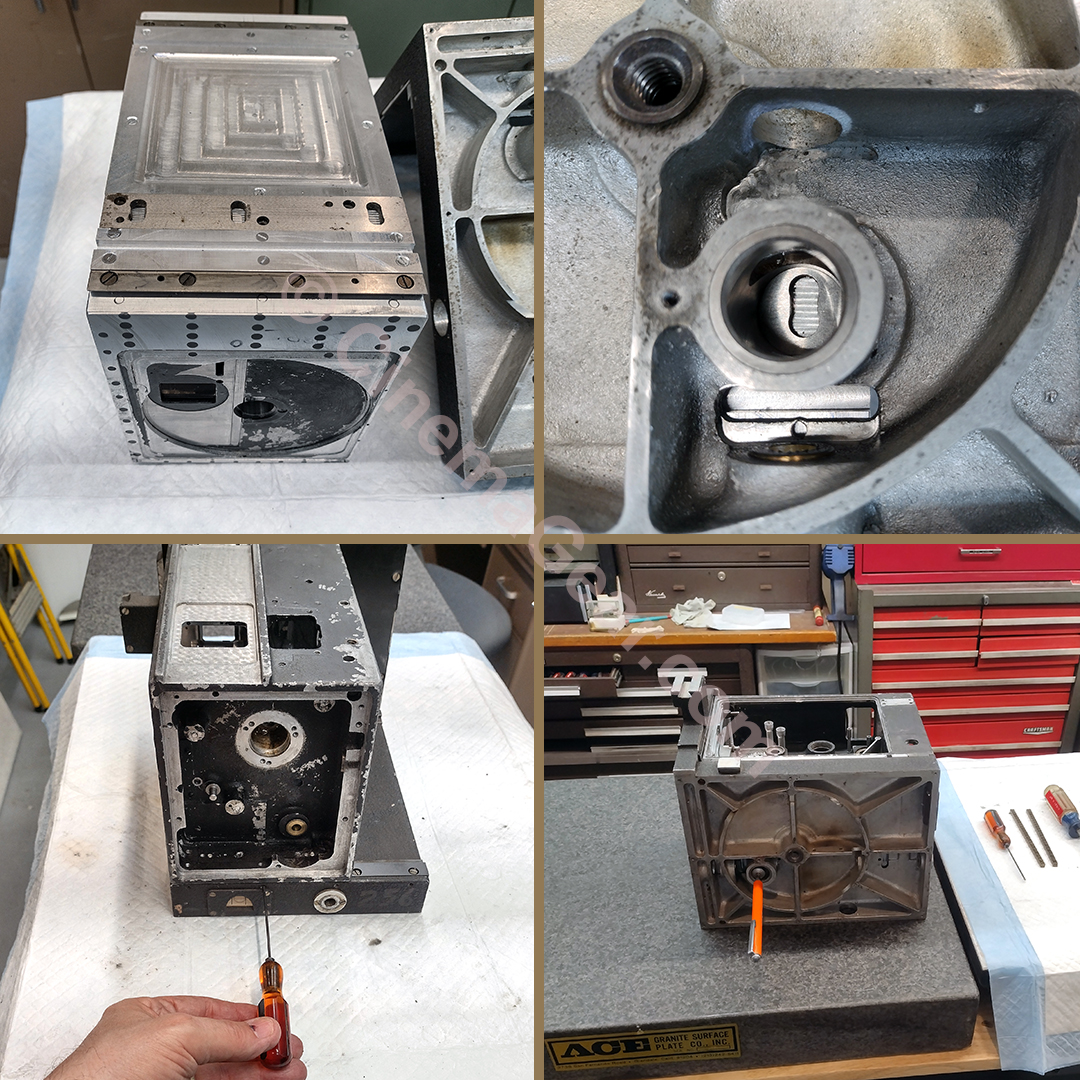
I reinstalled the movement at this point so I could use it to center the opening in the L-base to the camera’s aperture. As I was machining the slots for the locating plate and the rack gears on the bottom of the camera, I made the slot for the locating plate a snug fit so the plate would stay in place without fasteners. Then I mounted the camera on the L-base, manually inserted the locating plunger into the locating plate, and tightened the dovetails so the camera would not slide easily. Next I set the camera on the surface plate so I could center the film aperture to the opening in the L-base. Satisfied with that, I pulled the locating plunger out of the L-base, loosened the dovetails, slid the camera off the L-base, and super glued the locating plate in position. Then I double checked everything, transfer punched the holes from the locating plate to the camera casting, drilled and tapped the holes, dug through the screw bin to find the correct screws, screwed everything together, and rechecked everything again, adjusting as needed. Once the aperture and L-base openings were perfectly centered, I drilled and reamed holes for dowel pins. That laborious step completed, it was now time to mount the rack gears on the bottom of the camera so they can be synced with the rackover spur gears that are operated by the T-handle mechanism. I drilled and counterbored holes between the teeth in the two rack gear sections, transfer punched those holes onto the bottom of the camera, drilled and tapped the holes, and mounted the rack gears. The next step was to begin reassembling the rackover L-base, making sure the locating plunger mechanism worked correctly, and getting the rackover spur gears timed correctly so the camera slides and stops smoothly and properly. All those sweat and tears finally paid off, and the camera racks over once more. Victory at last!