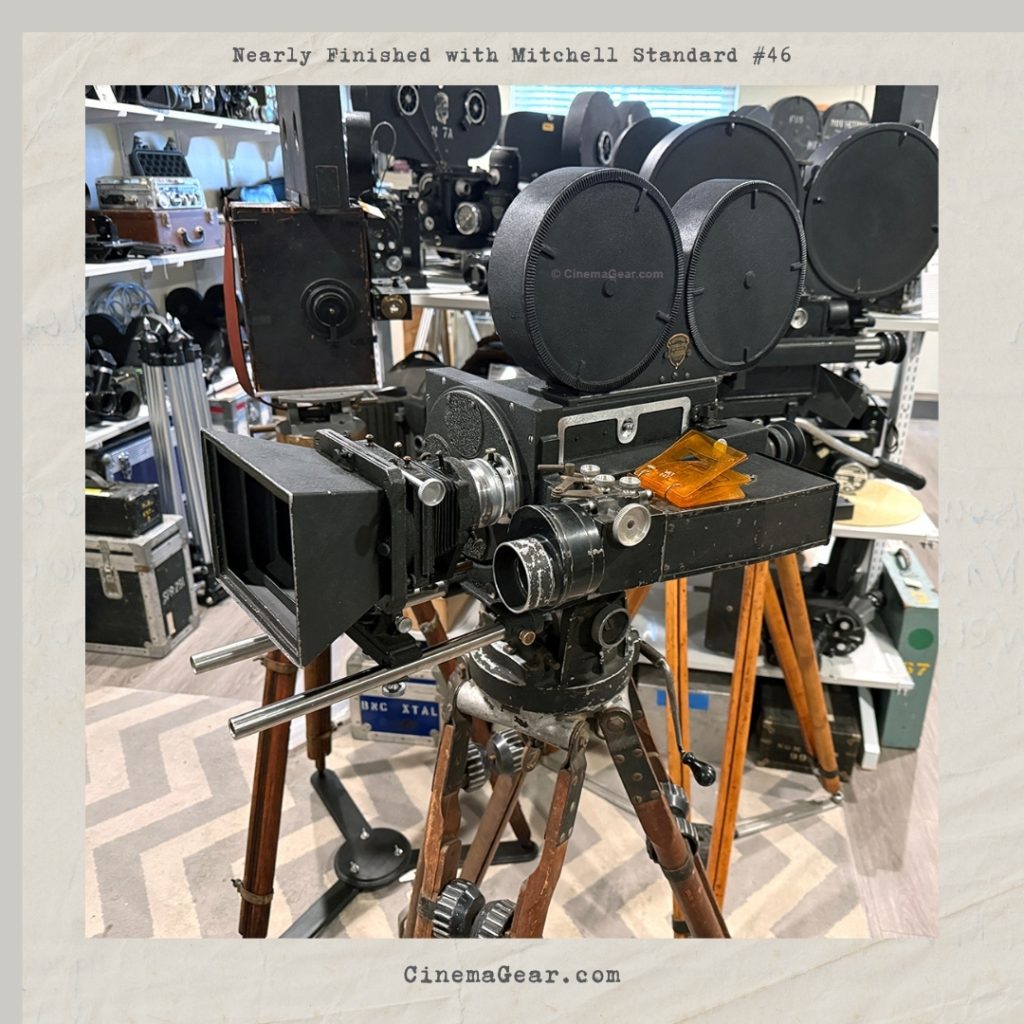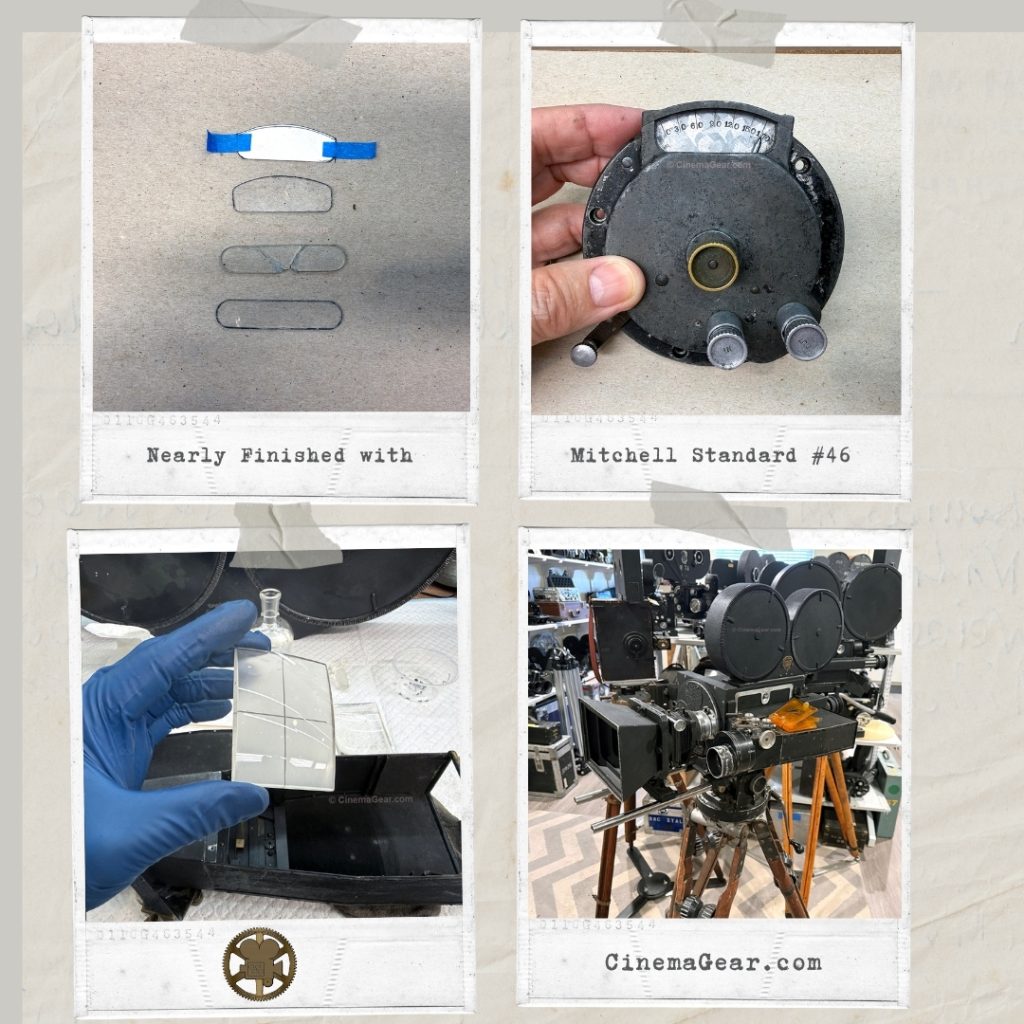
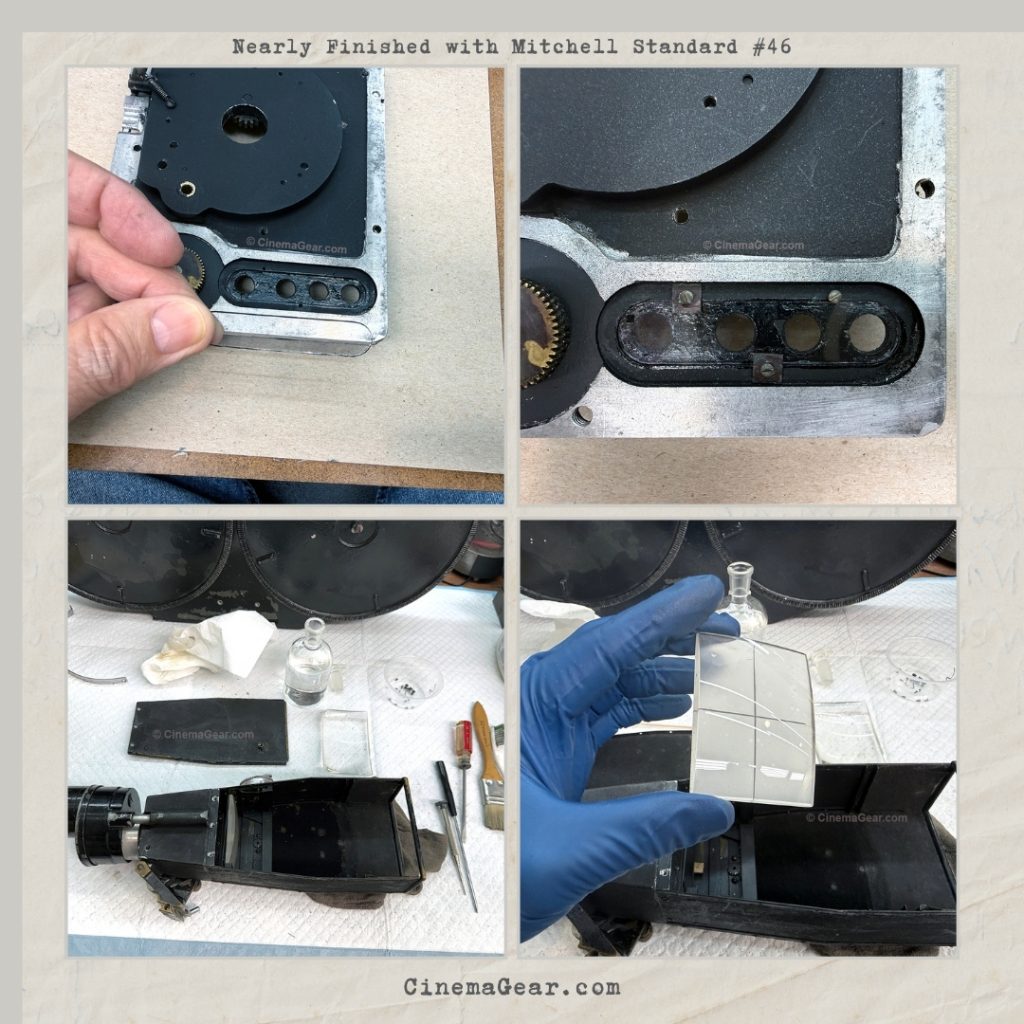
I am putting the finishing touches on my restoration of Mitchell Standard 46, and I’m nearly done! The painting is complete, and I spent quite a while carefully removing miles of masking tape and paper from the various parts of the camera. The next step was to begin reinstalling the shutter drive, the movement, and the sprocket drive assemblies. That done, I moved on to address the missing glasses from the footage/frame counter window and the shutter position window.
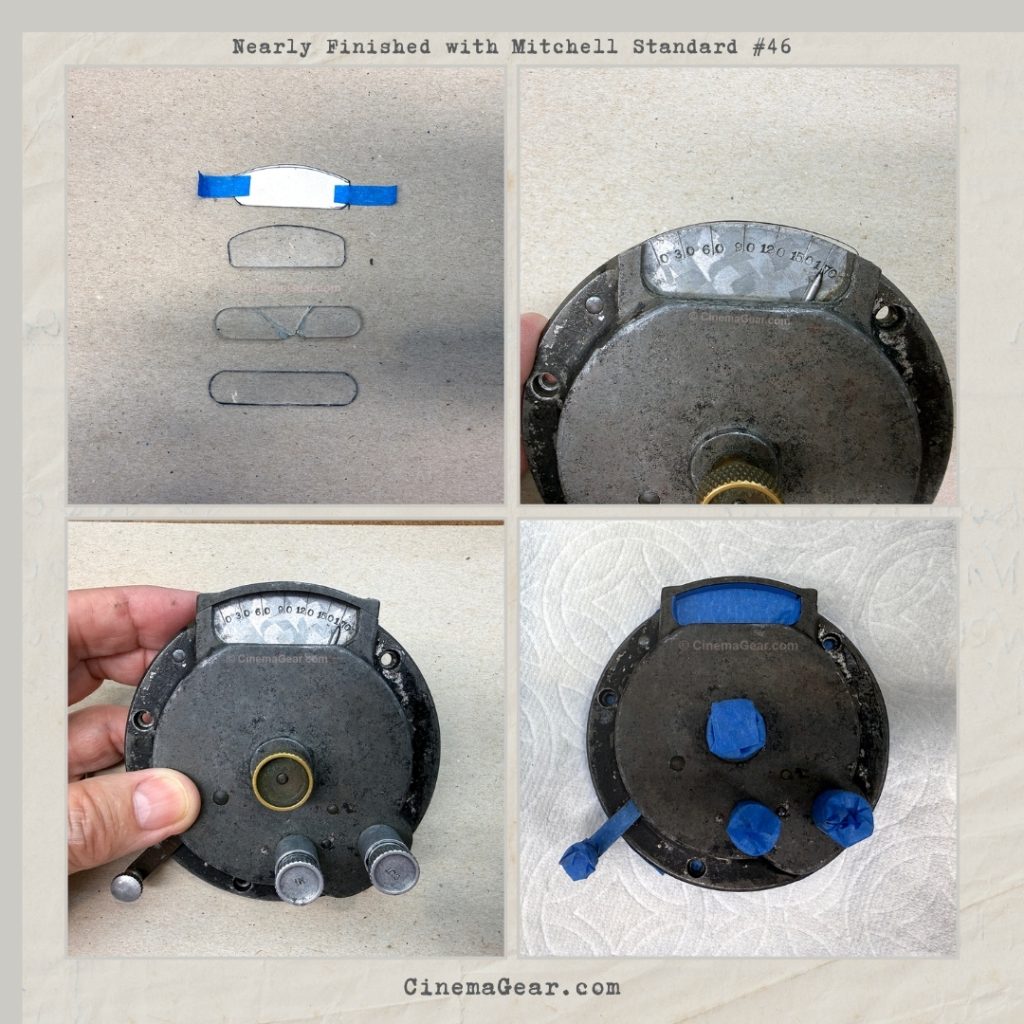
I took some glass microscope slide blanks and carefully ground them to the proper shapes. Then I set the new footage/frame counter glass in position, reinstalled the back plate of the camera, then added the glass for the shutter position window, and reinstalled the fade/dissolve unit. The camera was then put back on its L-base, the rackover lever was timed correctly, and the camera is now completely reassembled! Yay!
In an effort to keep the accessories in the same vintage as the camera, I selected an early West Hollywood sidefinder. The sidefinder was very dirty inside, so it had to be disassembled, all the glass elements removed and cleaned, and once reassembled, it was put on the camera. The matte box doesn’t have a badge on it, but it is the correct style for the period. All of the peanut motors I have are much more modern than this camera, so I have opted to fit it only with a hand crank. I was able to find a vintage West Hollywood 400’ magazine that was, unfortunately, in pretty terrible condition. Fortunately, I was able to replace the old upholstery with the correct narrow wale black corduroy, clean everything, and repaint the magazine. The last step was to select a Mitchell geared head and tripod to complete the package.