A series of 4 film strips, each with 3 images showing the process of repairing a broken Auricon tripod with pan tilt head and containing the caption “Mending a Slightly Wounded Auricon Tripod” from CinemaGear.com

Mending a Slightly Wounded Auricon Tripod

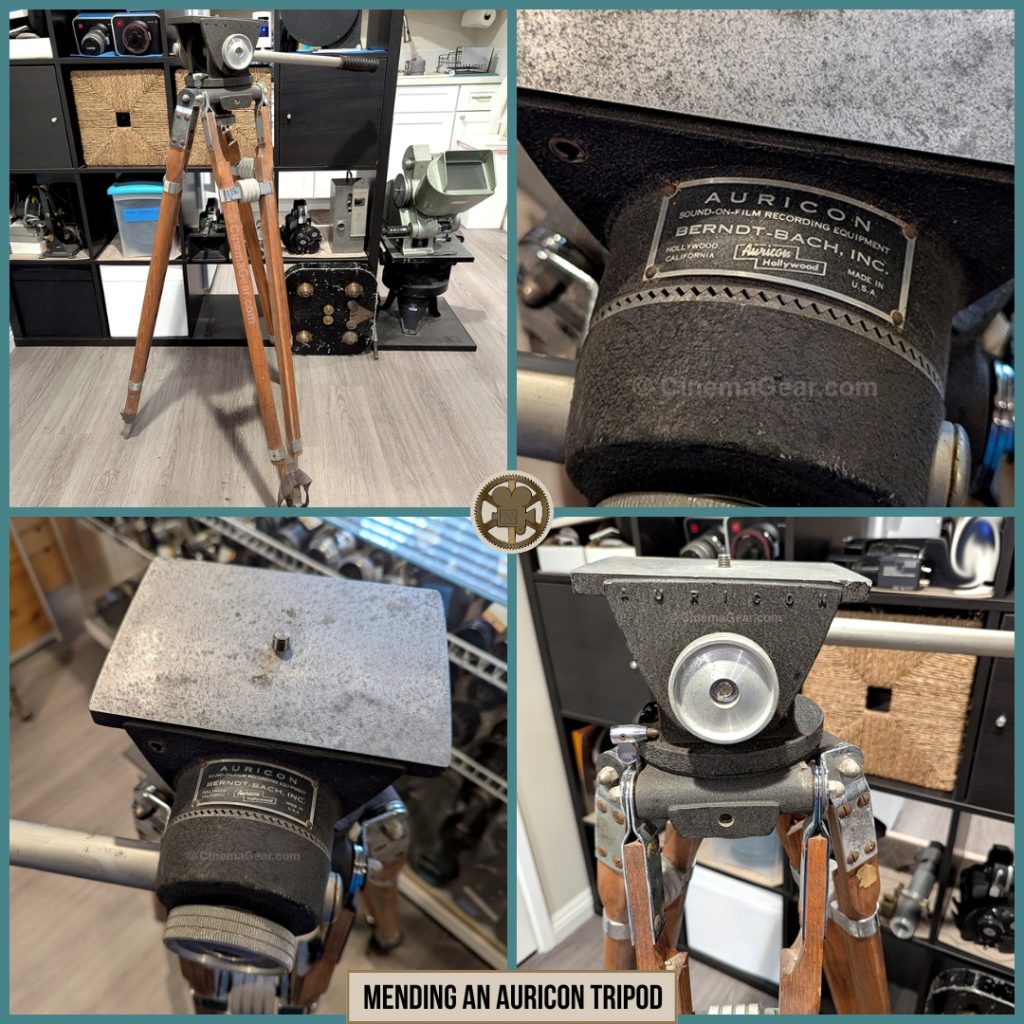
Amongst the remarkable antique camera haul I shared with you a couple of weeks ago was, what at first glance, looked like a very gently used Auricon tripod with friction head. When we pulled the tripod out of its shipping tube, it had been disassembled, the legs separate from the pan tilt head. At this point I noticed that the top part of one of the legs was broken off.

A grid of 4 images showing the steps taken to repair a broken Auricon tripod: (top left) the tripod, disassembled, showing the broken piece of the tripod leg; (top right) the metal pieces removed and the wood pieces of the broken leg glued back together and clamped together; (bottom left) the two glued pieces reattached, glue dried, and clamps removed; (bottom right) he two glued pieces reattached, glue dried, and clamps removed.

Even with this broken leg, the tripod still appeared in extremely nice condition with very few signs of wear and tear. The break on this leg was so clean, I could literally fit the pieces back together nearly seamlessly. How this came to be broken, I am not sure, but I was determined to fix it if possible.

A grid of 4 images showing the steps taken to repair a broken Auricon tripod: (top left) selecting the correct drill bit to drill the hole through the reattached pieces of the tripod leg; (top right) drilling the long pilot hole through the reattached pieces of the tripod leg; (bottom left) drilling the long pilot hole through the reattached pieces of the tripod leg; (bottom right) the wood screw after decreasing the diameter of the screw head.

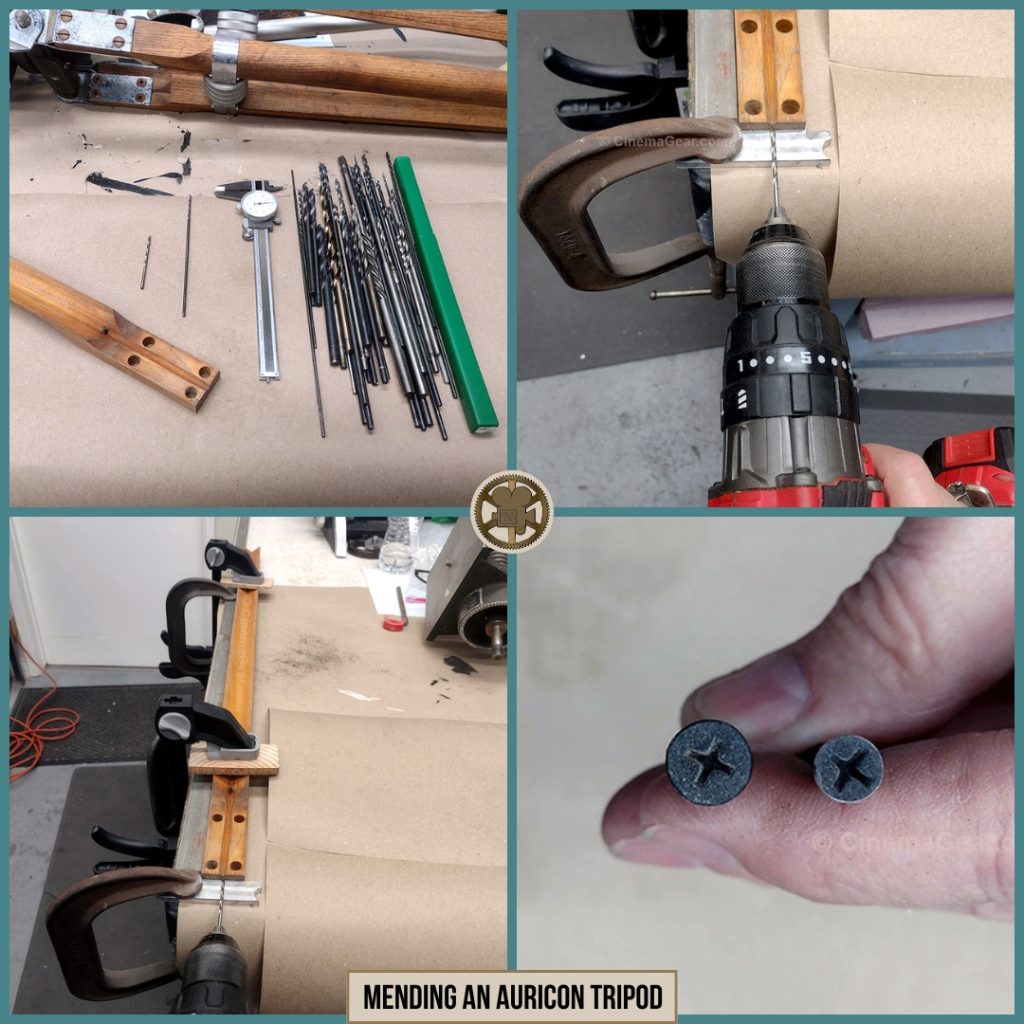
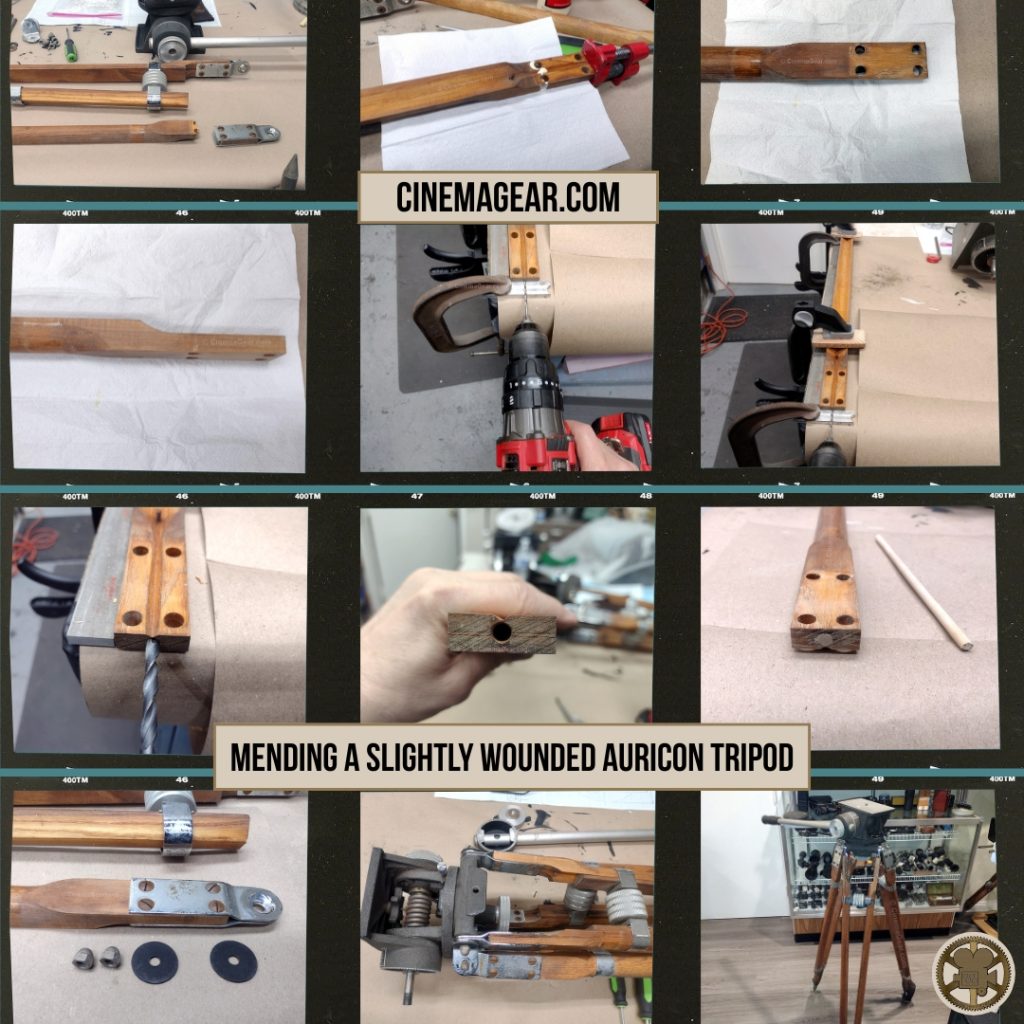
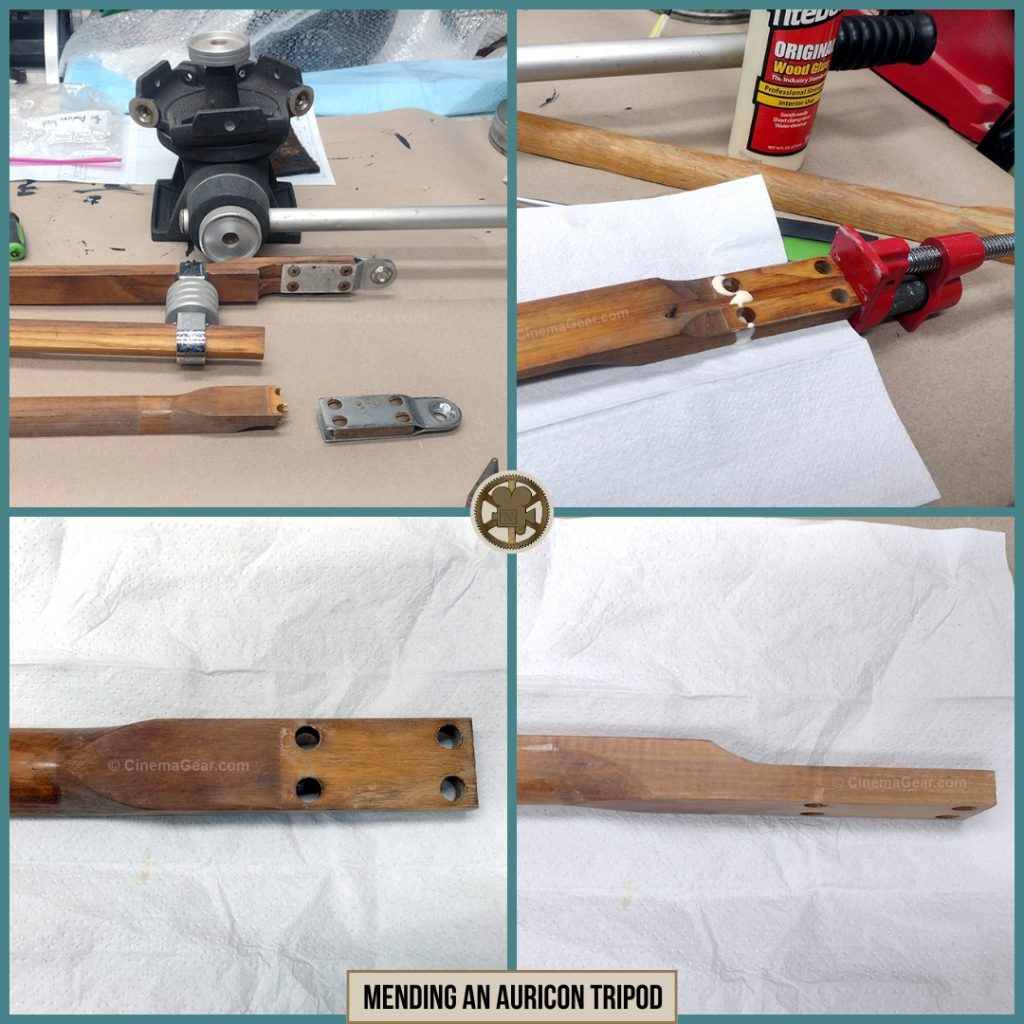
People keep telling me that the modern wood glues are stronger than the wood itself, so since the pieces fit so neatly back together, I applied a generous amount of wood glue and clamped the leg along its length and across its face while the glue dried. Being inherently skeptical of the “stronger than the wood itself” claim, once the clamps were removed, I pulled a 3 inch long wood screw out of the hardware collection, and turned the head of the screw down to a smaller diameter so the counterbore I had to drill in the top of the leg would be as small as possible. Once the counterbore was established, I drilled a pilot hole through the top of the leg and into the main body of the leg.

A grid of 4 images showing the steps taken to repair a broken Auricon tripod: (top left) drilling the counterbore hole through the reattached pieces of the tripod leg; (top right) installing the altered wood screw to secure the two reattached pieces of the tripod leg; (bottom left) the final hole in the tripod leg after the screw was installed but before the wooden dowel was inserted; (bottom right) gluing the wooden dowel in the hole to finish attaching the broken pieces of the tripod leg.

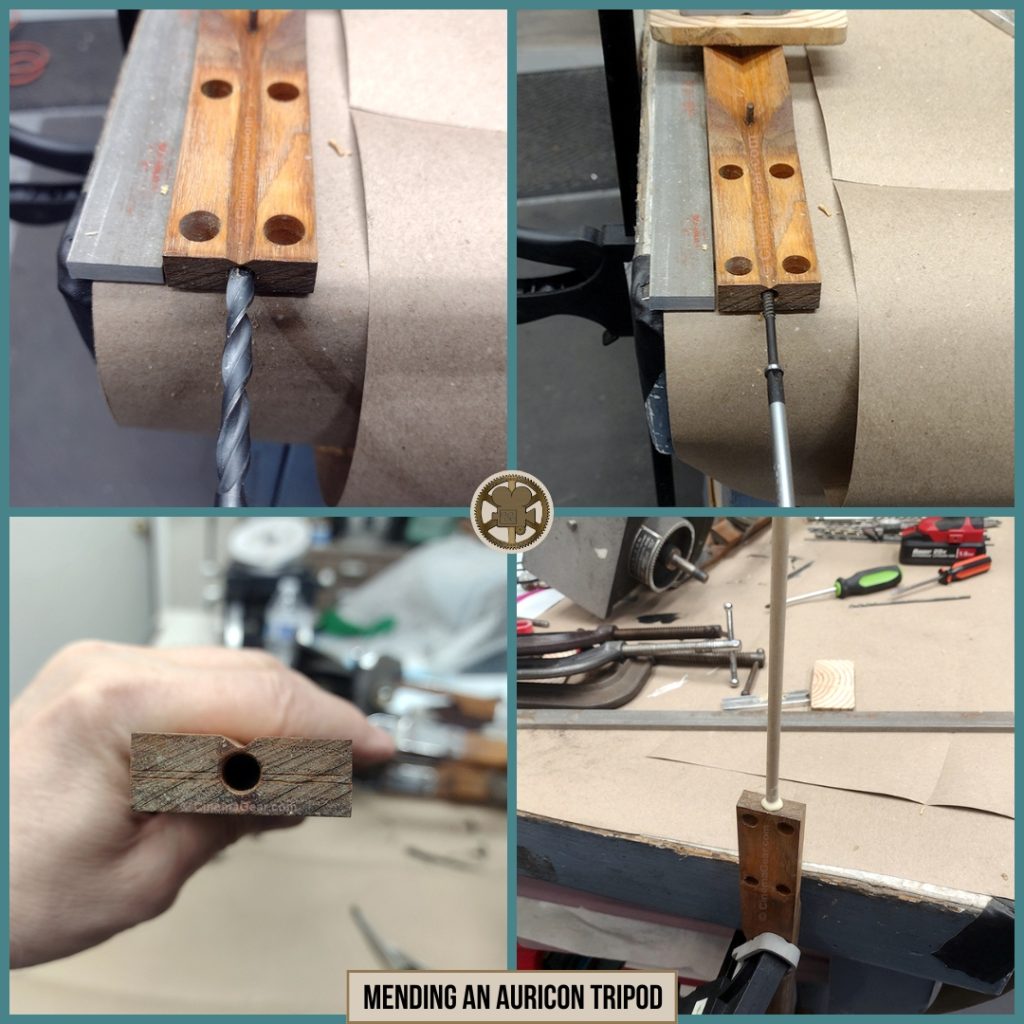
Once the screw was installed completely, I cut a wooden dowel and glued it into the counterbore hole, figuring if the “stronger than the wood itself” claim was true, this would return the leg to its original strength.

A grid of 4 images showing the steps taken to repair a broken Auricon tripod: (top left) the hole now filled with wood screw and wooden dowel, excess wood removed; (top right) reattaching the metal mounting plate to the top of the tripod leg; (bottom left) all 3 tripod legs reattached to the pan tilt head; (bottom right) the repaired and fully assembled Auricon tripod with friction pan tilt head.

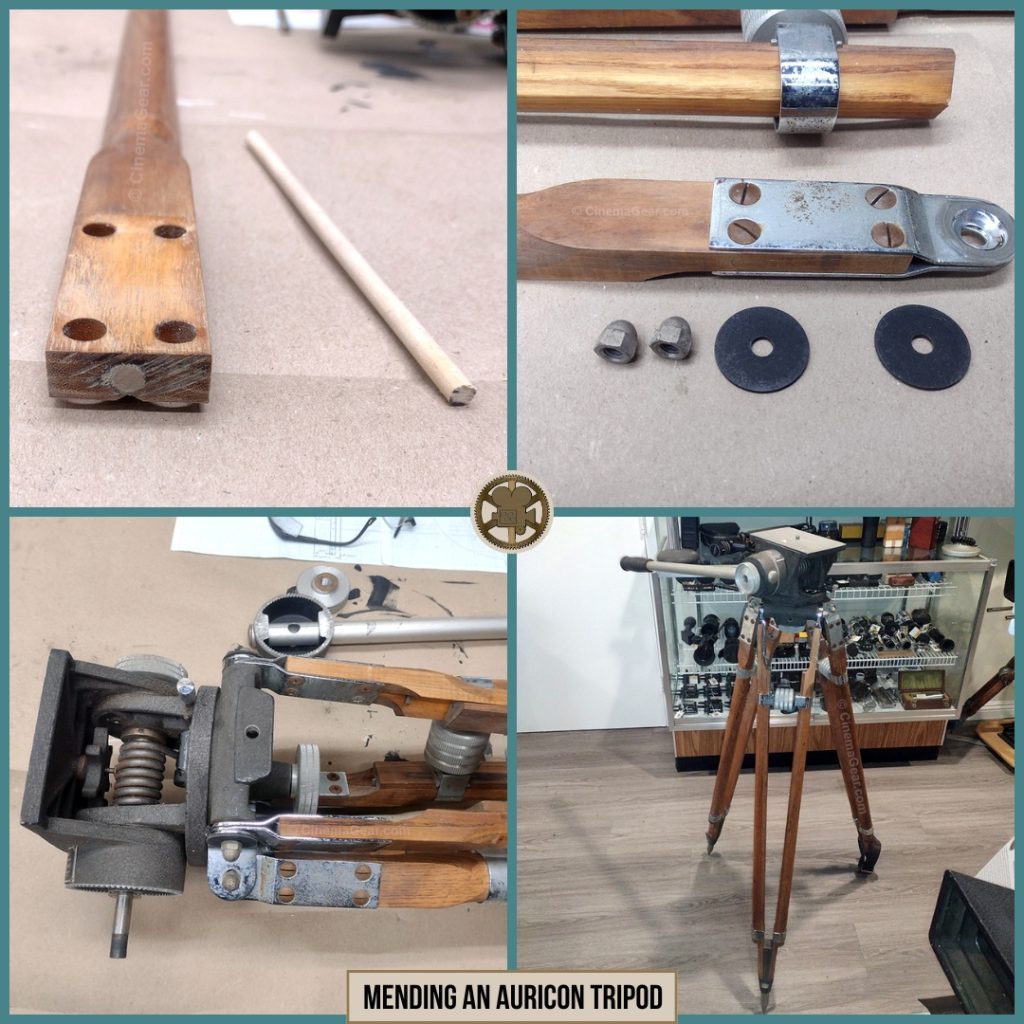
I let everything set up for another day so I was sure the glue had completely cured everywhere, and at that point, I could no longer tell that the leg had ever been broken. Between the glue and steel screw, I am confident that this tripod is now as good as new. Now to pick an Auricon camera to sit atop it . . .

A grid of 4 images showing the steps taken to repair a broken Auricon tripod: (top left) the repaired and fully assembled Auricon tripod with friction pan tilt head; (top right) a closeup of the Auricon badge on the side of the pan tilt head; (bottom left) a closeup of the top of the pan tilt head; (bottom right) a closeup of the Auricon labeling on the side of the pan tilt head.

Leave a Comment

Your email address will not be published. Required fields are marked *