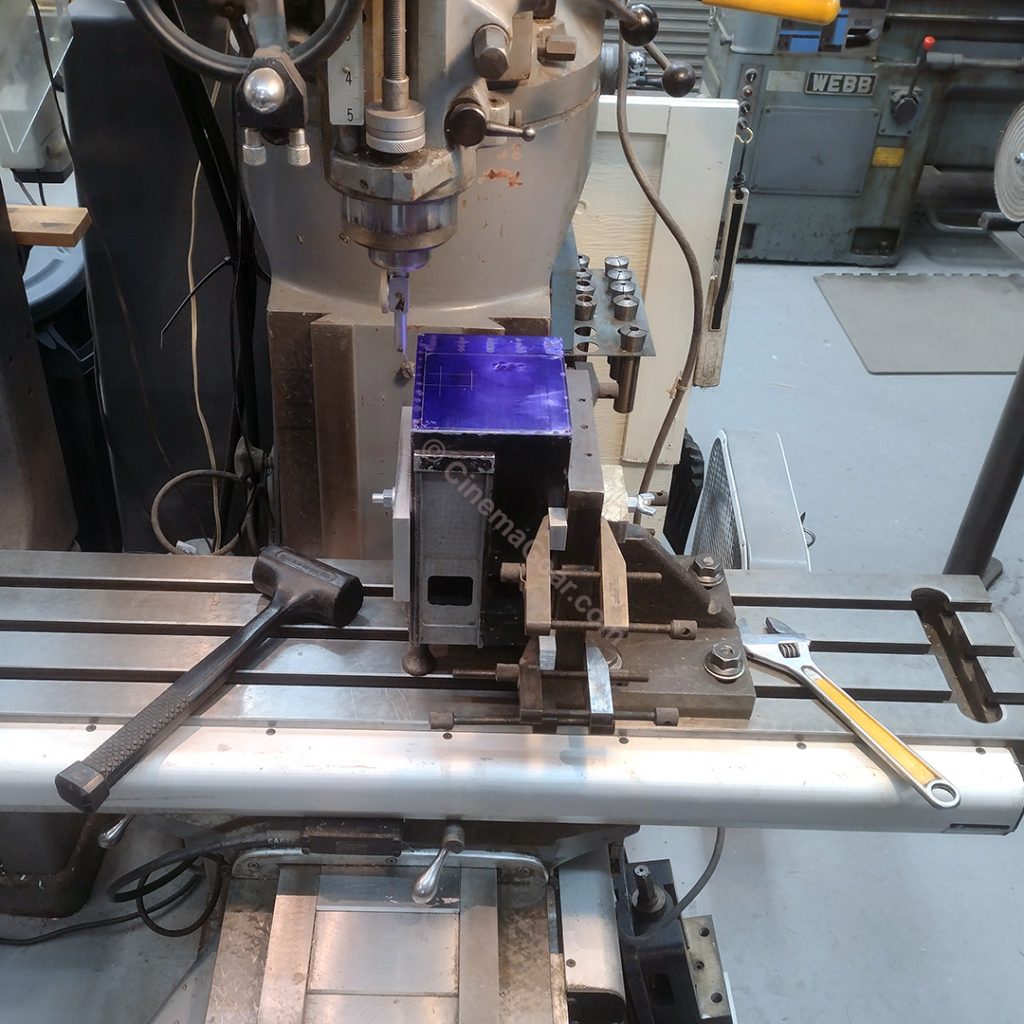
Despite my good intentions, replacing the roof on our building interfered tremendously with progress on Mitchell 46 this week. My next step in restoring this camera was to prepare the casting so it can be accurately mounted on the milling machine. There are very few things on the casting that remain true, so the only way to make them true is to indicate everything from reference surfaces on the camera movement and then machining everything to be true again. With the movement mounted in the camera, and because the replacement front plate has to be in place before I can do any machining, there are very few surfaces that are true to the aperture horizontally and vertically to measure from. I set the camera up on a precision L-plate and chose the leading edge of the aperture plate as the surface to indicate from. The casting was attached to the L-plate so that it could be adjusted until it was true and parallel to the surface plate within 0.001 inch.
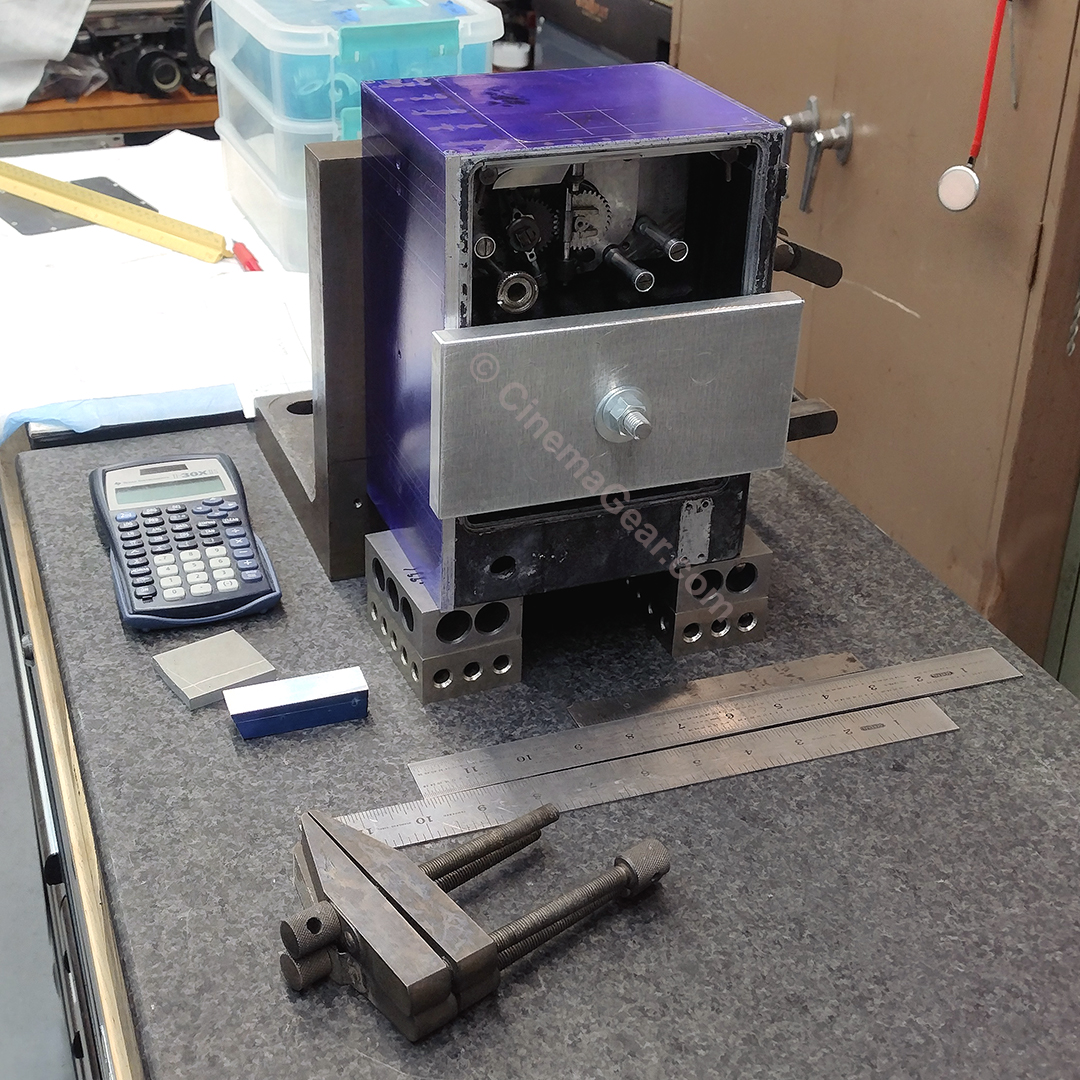

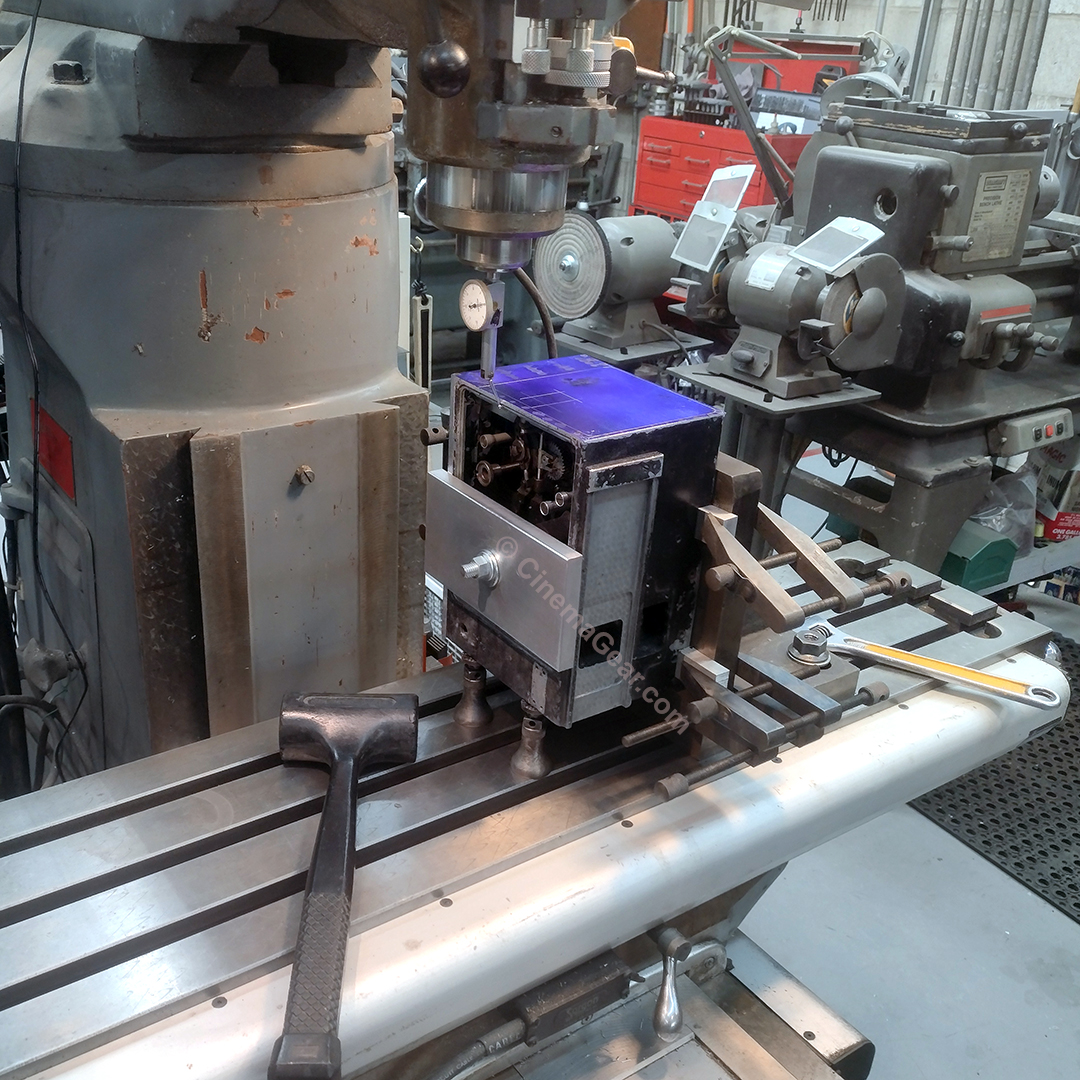
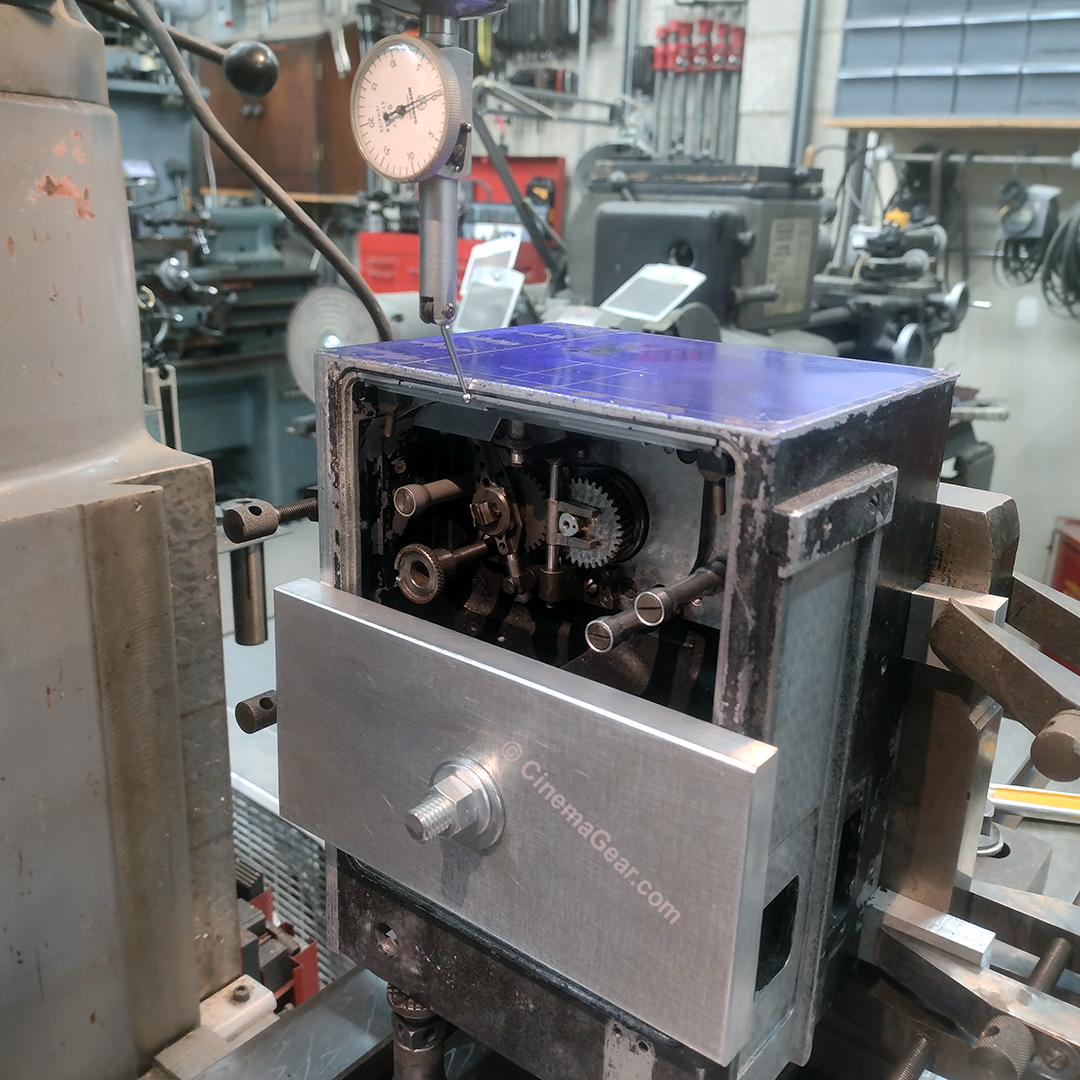
Guide blocks were c-clamped to the L-plate to keep the camera from moving while machining. The giant metal plate in the middle acts like a giant clamp to hold the camera against the surface of the L-plate. Once I was satisfied with this part, I moved the setup to the milling machine. Now I indicated the leading edge of the aperture plate so it runs true and parallel with the Y axis of the milling machine. The first thing I will machine is the pocket for the shutter light trap. Once that material is cleared, I will be able to indicate from the movement so that all areas of the casting are true to the film plane. That unfortunately is as far as I was able to get this week. The new roof looks great though! I will be taking a break from this project next week while I service the Dykstraflex camera for the Academy of Motion Picture Arts and Sciences.